Last updated: September 8, 2020.
I’m outlining what I would do to winterize MY Ascape. Couple of caveats… since I don’t have to winterize these are simply suggestions from many years or RV’ing in all kinds of weather. Keep in mind that YOUR Ascape may be slightly different but I trust this will help in transposing to your particular model.
- Drain/empty fresh water tank.
- Drain/empty grey water tank.
- Drain kitchen sink.
- Deal with hot water tank. Empty and install bypass or fill with RV antifreeze.

Loosen the cap to drain.
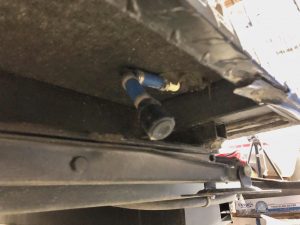
The kitchen drain:
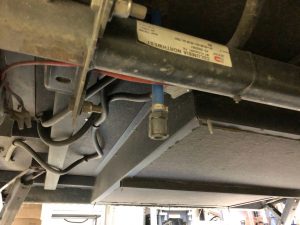
Hot Water tank:
Regardless of wether you plan to install the bypass or use more RV antifreeze, the tank should be drained and anode inspected. Be sure to open the safety valve at the top by pulling the lever to assure you’re not getting a false ’empty’.
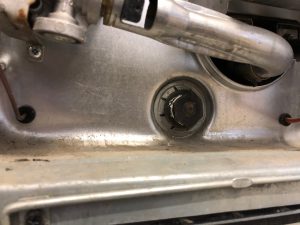
If you are planning to install this bypass leave the anode out until spring.
If you are going the other route re-install the anode/plug.
Suggestion/recommendation passed on by fellow Aliner Ascaper Darrell Yates:
Instead of re-installing the anode, use a straight plug instead. In spring, remove plug to drain out the RV antifreeze and re-install anode/plug. /Thanks Darrell.
By other route I mean that you plan to fill your hot water tank with RV antifreeze instead of installing the bypass.
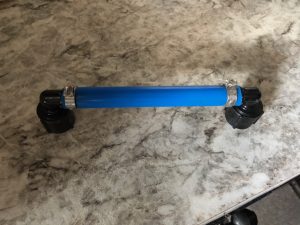
Assuming we want to save a few bucks install the bypass:
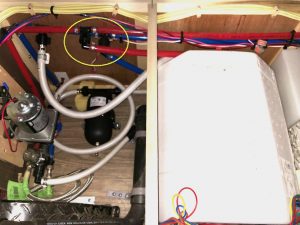
The short bypass installs where the hot water tank fittings connect to the main water line. It installed between the main cold water (blue) and the hot water main (red). Follow the lines from the hot water tank and install the bypass as if it was the hot water tank.
Just a heads-up… your plumbing compartment may not look like mine as I’ve added an accumulator and softer hoses. The area where the bypass goes is stock though.
Make sure all drains are closed, including the grey water drain.
Add 3-4 or more gallons of RV fresh water antifreeze to the fresh water tank.
10+ gallons will be needed if you are not installing the hot water tank bypass.
Turn on the water pump until it’s primed and shuts itself off.
Open one tap at a time, hot and cold, until RV antifreeze comes out generously.
Don’t forget the outside shower.
If pump starts to draw air, add more RV antifreeze.
Now for the Porta-Potty:
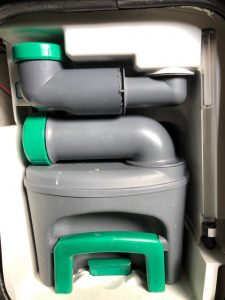
Drain the flushing tank by flushing until empty. Empty the waste tank. Add some RV antifreeze to the flushing tank and operate the flush so that pipes and pump get filled with RV antifreeze. Having a bit of antifreeze in the waste tank will also help. Alternatively you could store the waste tank in a warm place.
A fridge door hint:
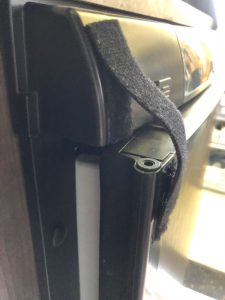
II use a Velcro strip to keep the door slightly open when fridge not in use.
During travel the velcro strip is tight, preventing the door from opening accidentally.
Hope this helps you to winterize your Ascape.
If you have suggestions to improve it or notice something I may have missed let me know in comments or on Facebook.
Recent Comments